The Wedge
An EDC multitool from concept to consumer in 10 weeks.
Overview
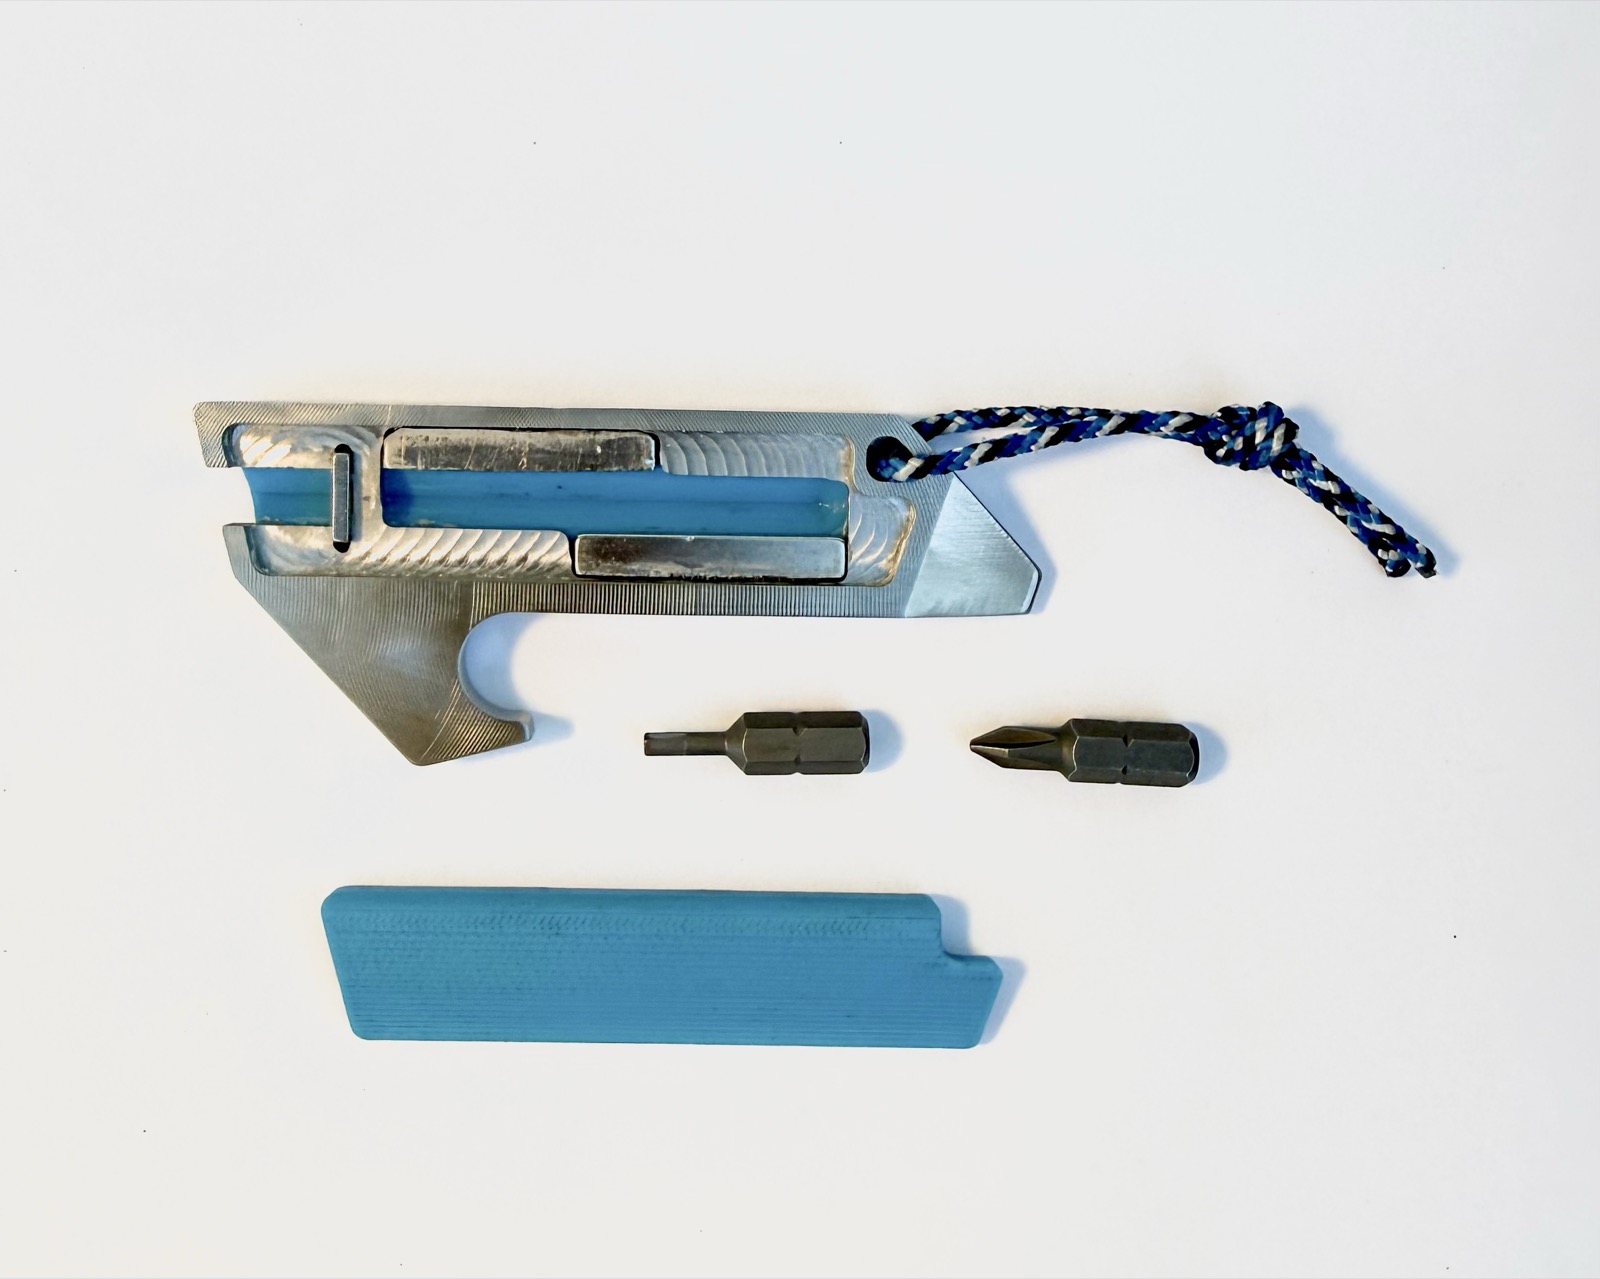
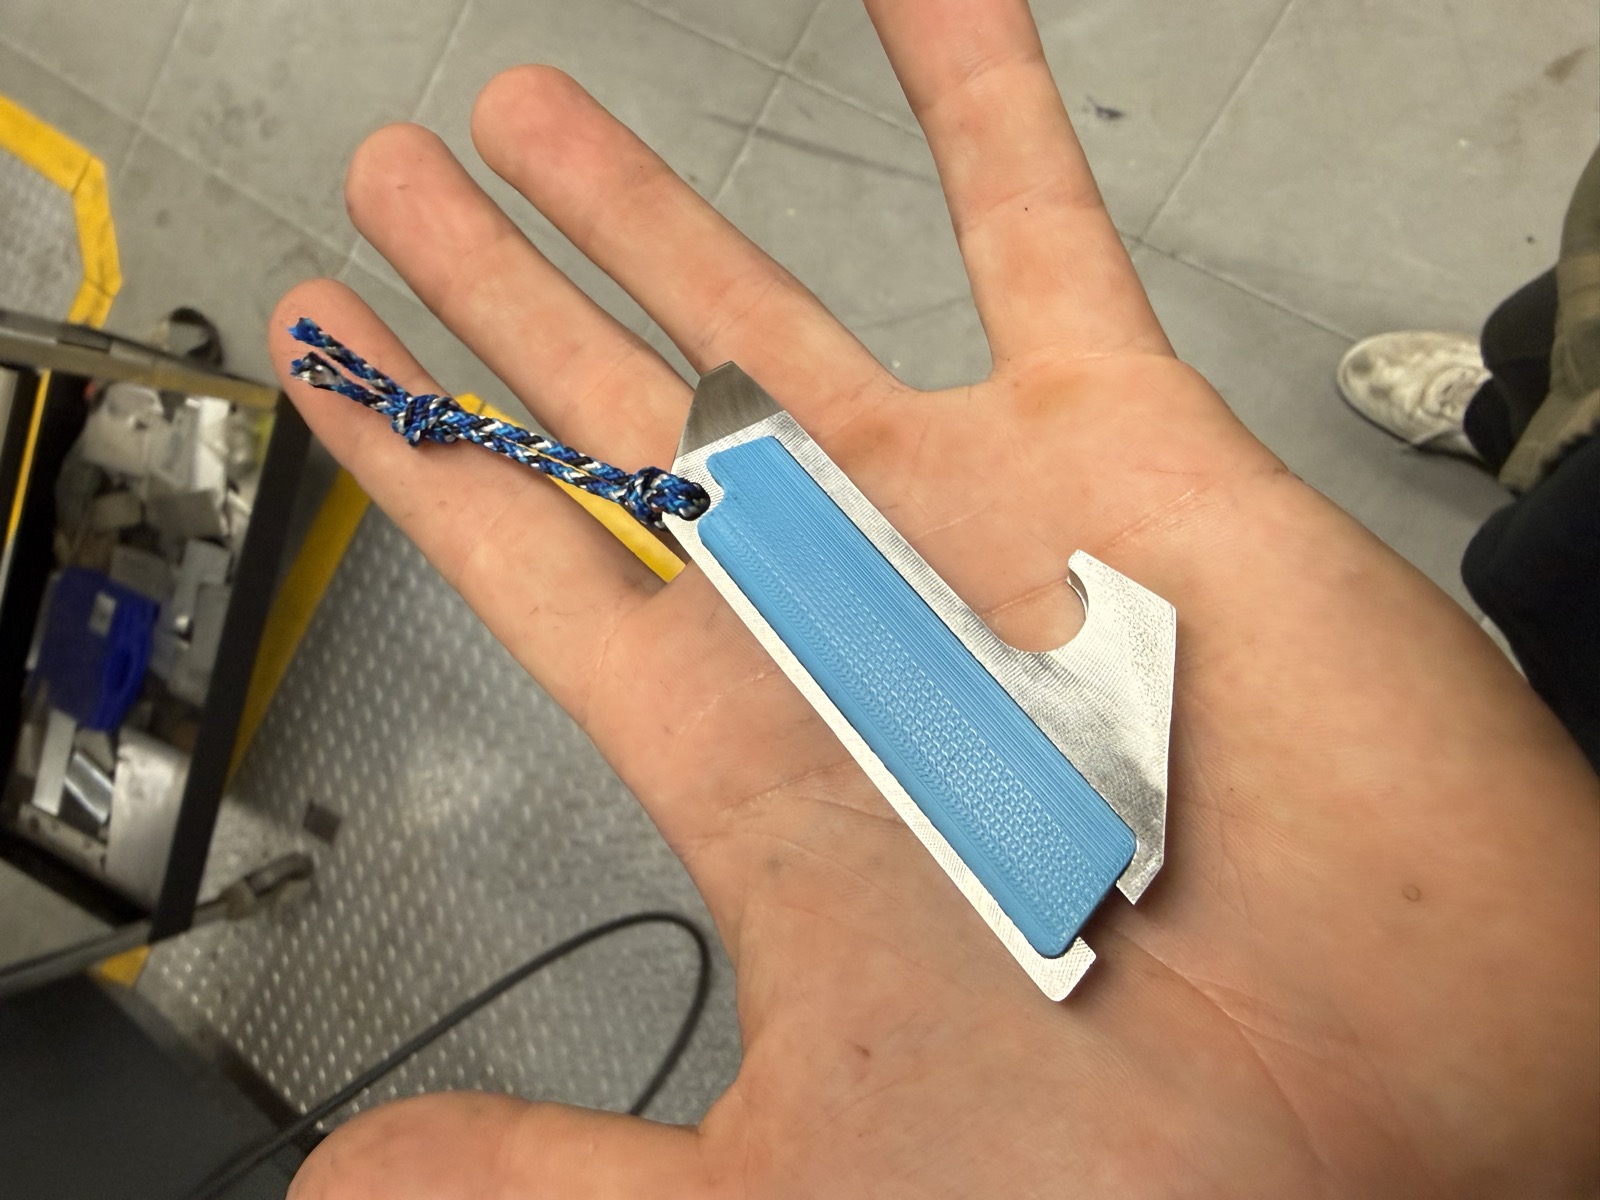
The Wedge was designed for quick unexpected tasks like a carburetor adjustment, tire airdowns when you get off the pavement, fin swap from a reef break mishap, or opening a cold one back at camp.
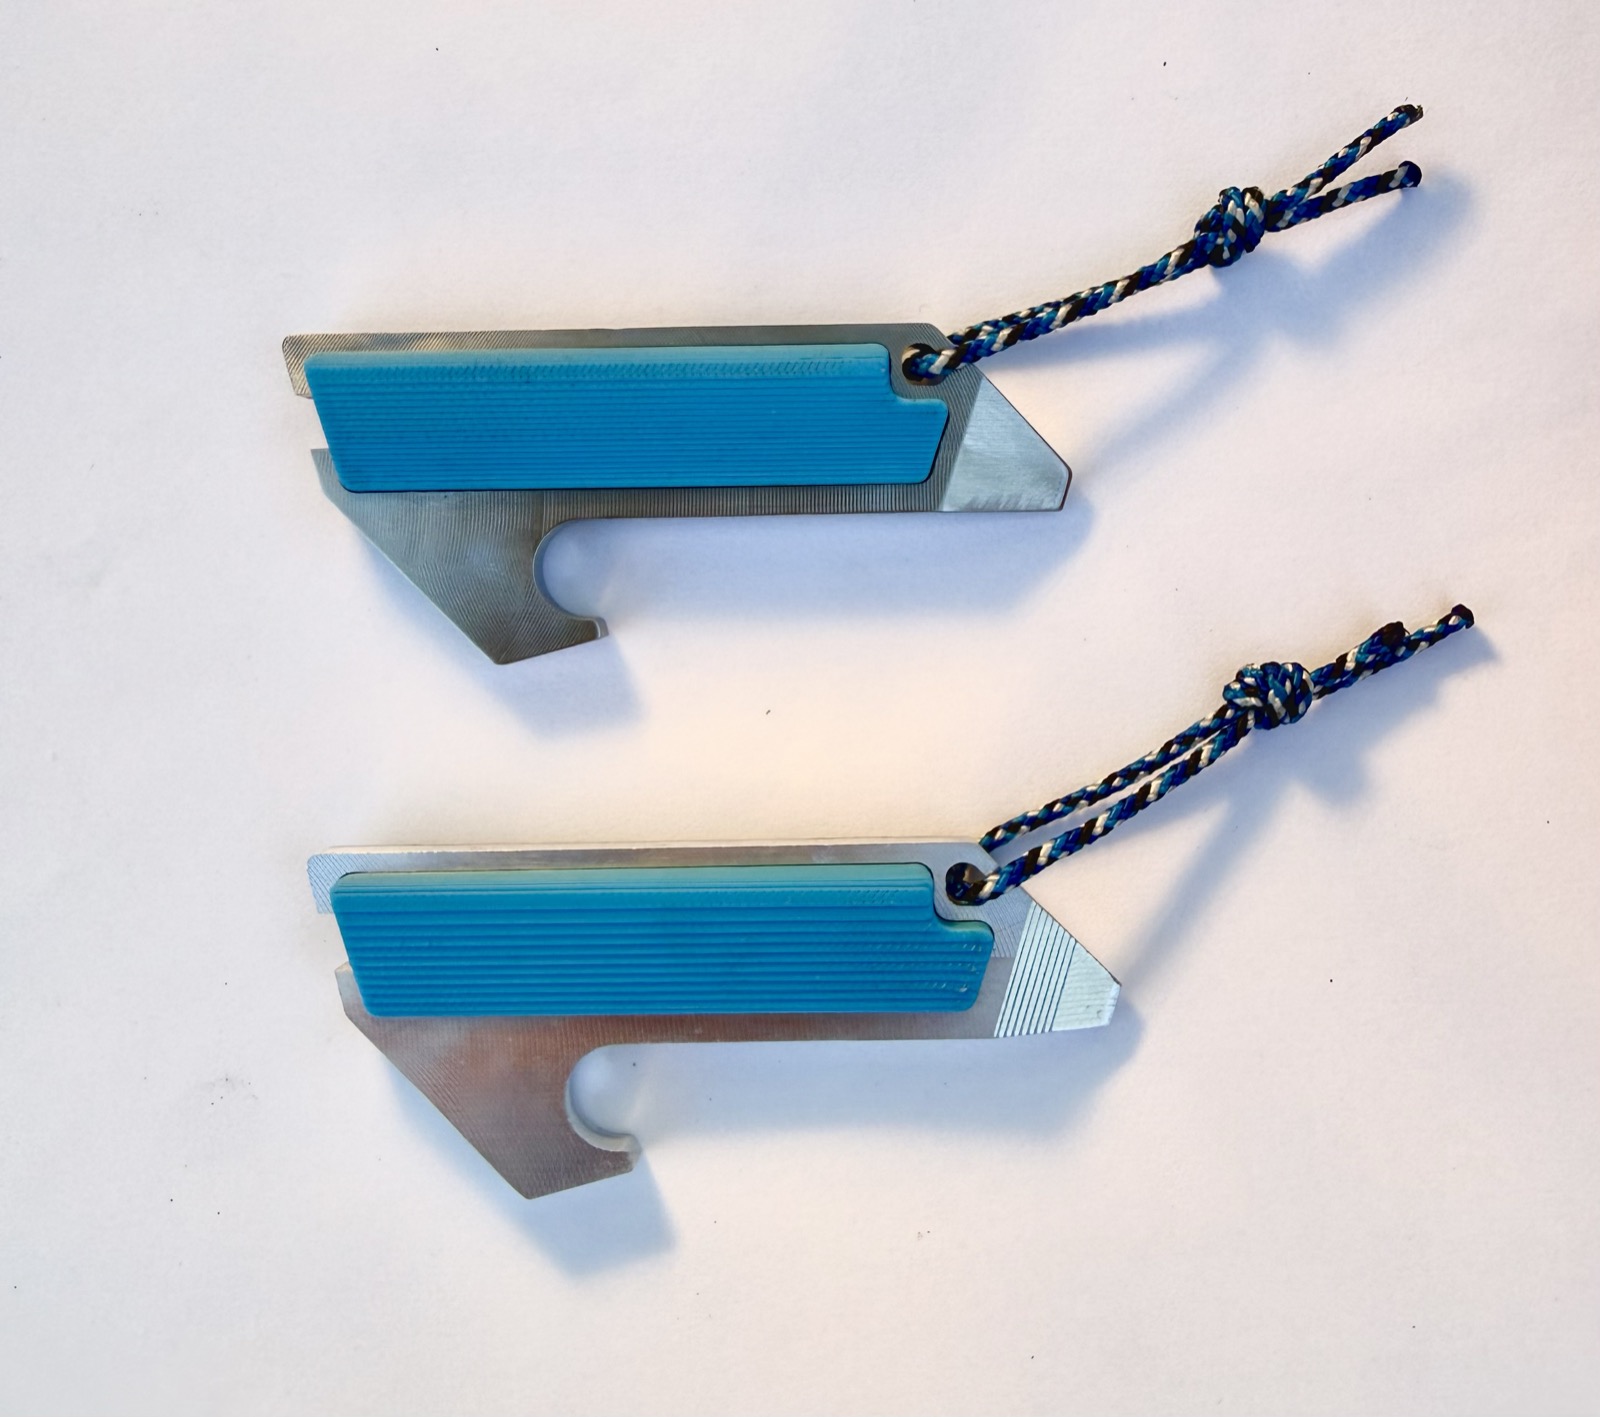
The Wedge is a compact 304 stainless steel / 6061 aluminum and PETG EDC multi-tool designed for surfers who drive their vintage Toyota to remote locations.
The brief: identify, research, and solve a real user problem, manufacture 30 sellable units, hit a positive margin, and present at the Central Coast Lean Summit in 10 weeks.
My Role
Ethnographic Research
10 in depth interviews
Before touching CAD, the team conducted structured ethnographic research across surfers, automotive enthusiasts, travelers, local retailers, and subject-matter experts. The goal: uncover latent needs and observe behavior to identify real user pain points.
We interviewed and observed 10 distinct users: 7 core surfers who also maintain vintage vehicles, and 3 stakeholders (local surf retailers in San Luis Obispo).
Research Insights
Users bring tools on surf trips but often pack them so deep in gear they're useless in an emergency.
Prying was a common observed and stated task amongst interviewees. Whether it was popping open a fuse box, a stuck electrical connector, or aligning a part that won't budge without a way to apply precise leverage.
Users regularly use wrong tools simply because they're the only thing within reach. Improvisation signals an unmet need.
"Pack light" is non-negotiable. Any tool added to a kit must deliver high utility per unit of size and weight to earn its place.
Problem Statement
“A 34-year-old surfer who drives a 1980s Toyota pickup needs a compact, reliable solution to maximize limited space and enable quick repairs to his surfboard or truck.”
Concept Development
Core Specs
Primary Function
Magnetic Bit Driver
Bits Included
3/32 Hex Allen (standard fin key) + Phillips #1
Secondary Function
Pry Bar / Flat Head & Bottle Opener
Carry
Paracord Leash String / Keychain Eyelet
Body Material
304 Stainless Steel / 6061 Aluminum
Scales
One removable (magnetic) and one fixed, made of PETG
Bit Retention
Neodymium Magnet behind removable scale
Dimensions
~90mm × 45mm × 6.5mm
Manufacturing
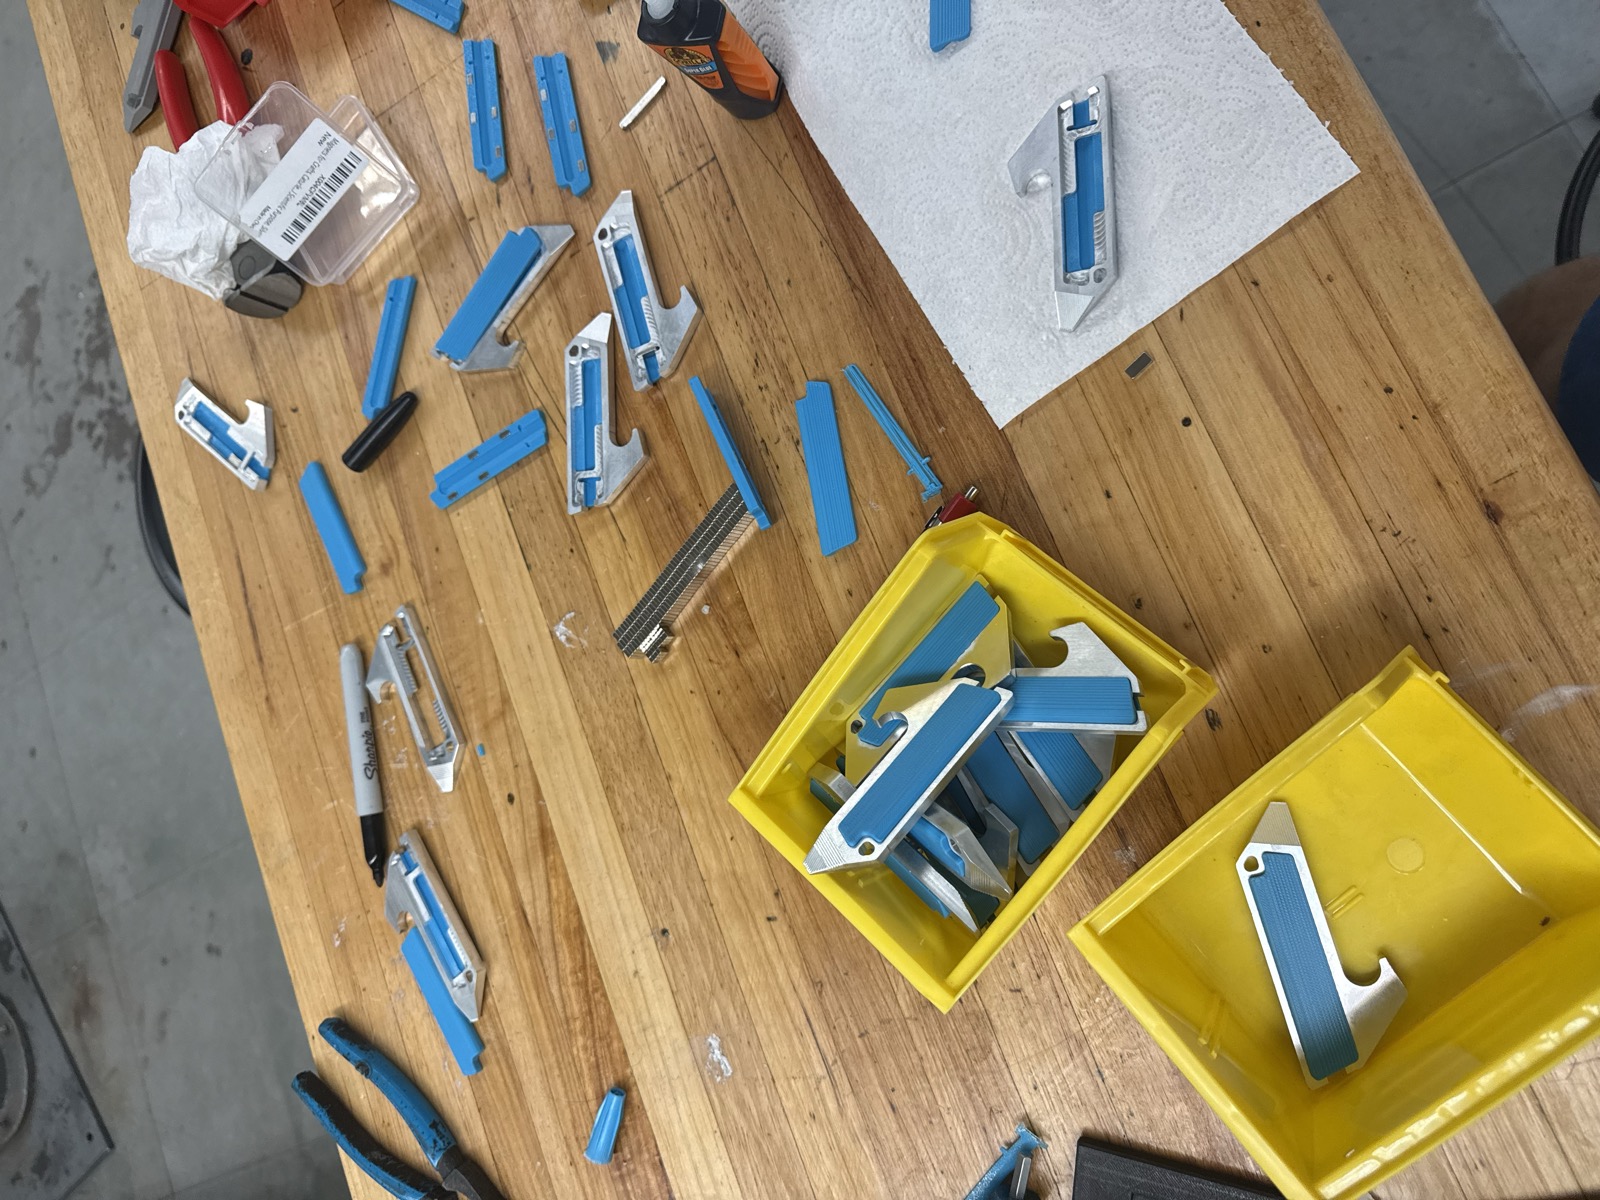
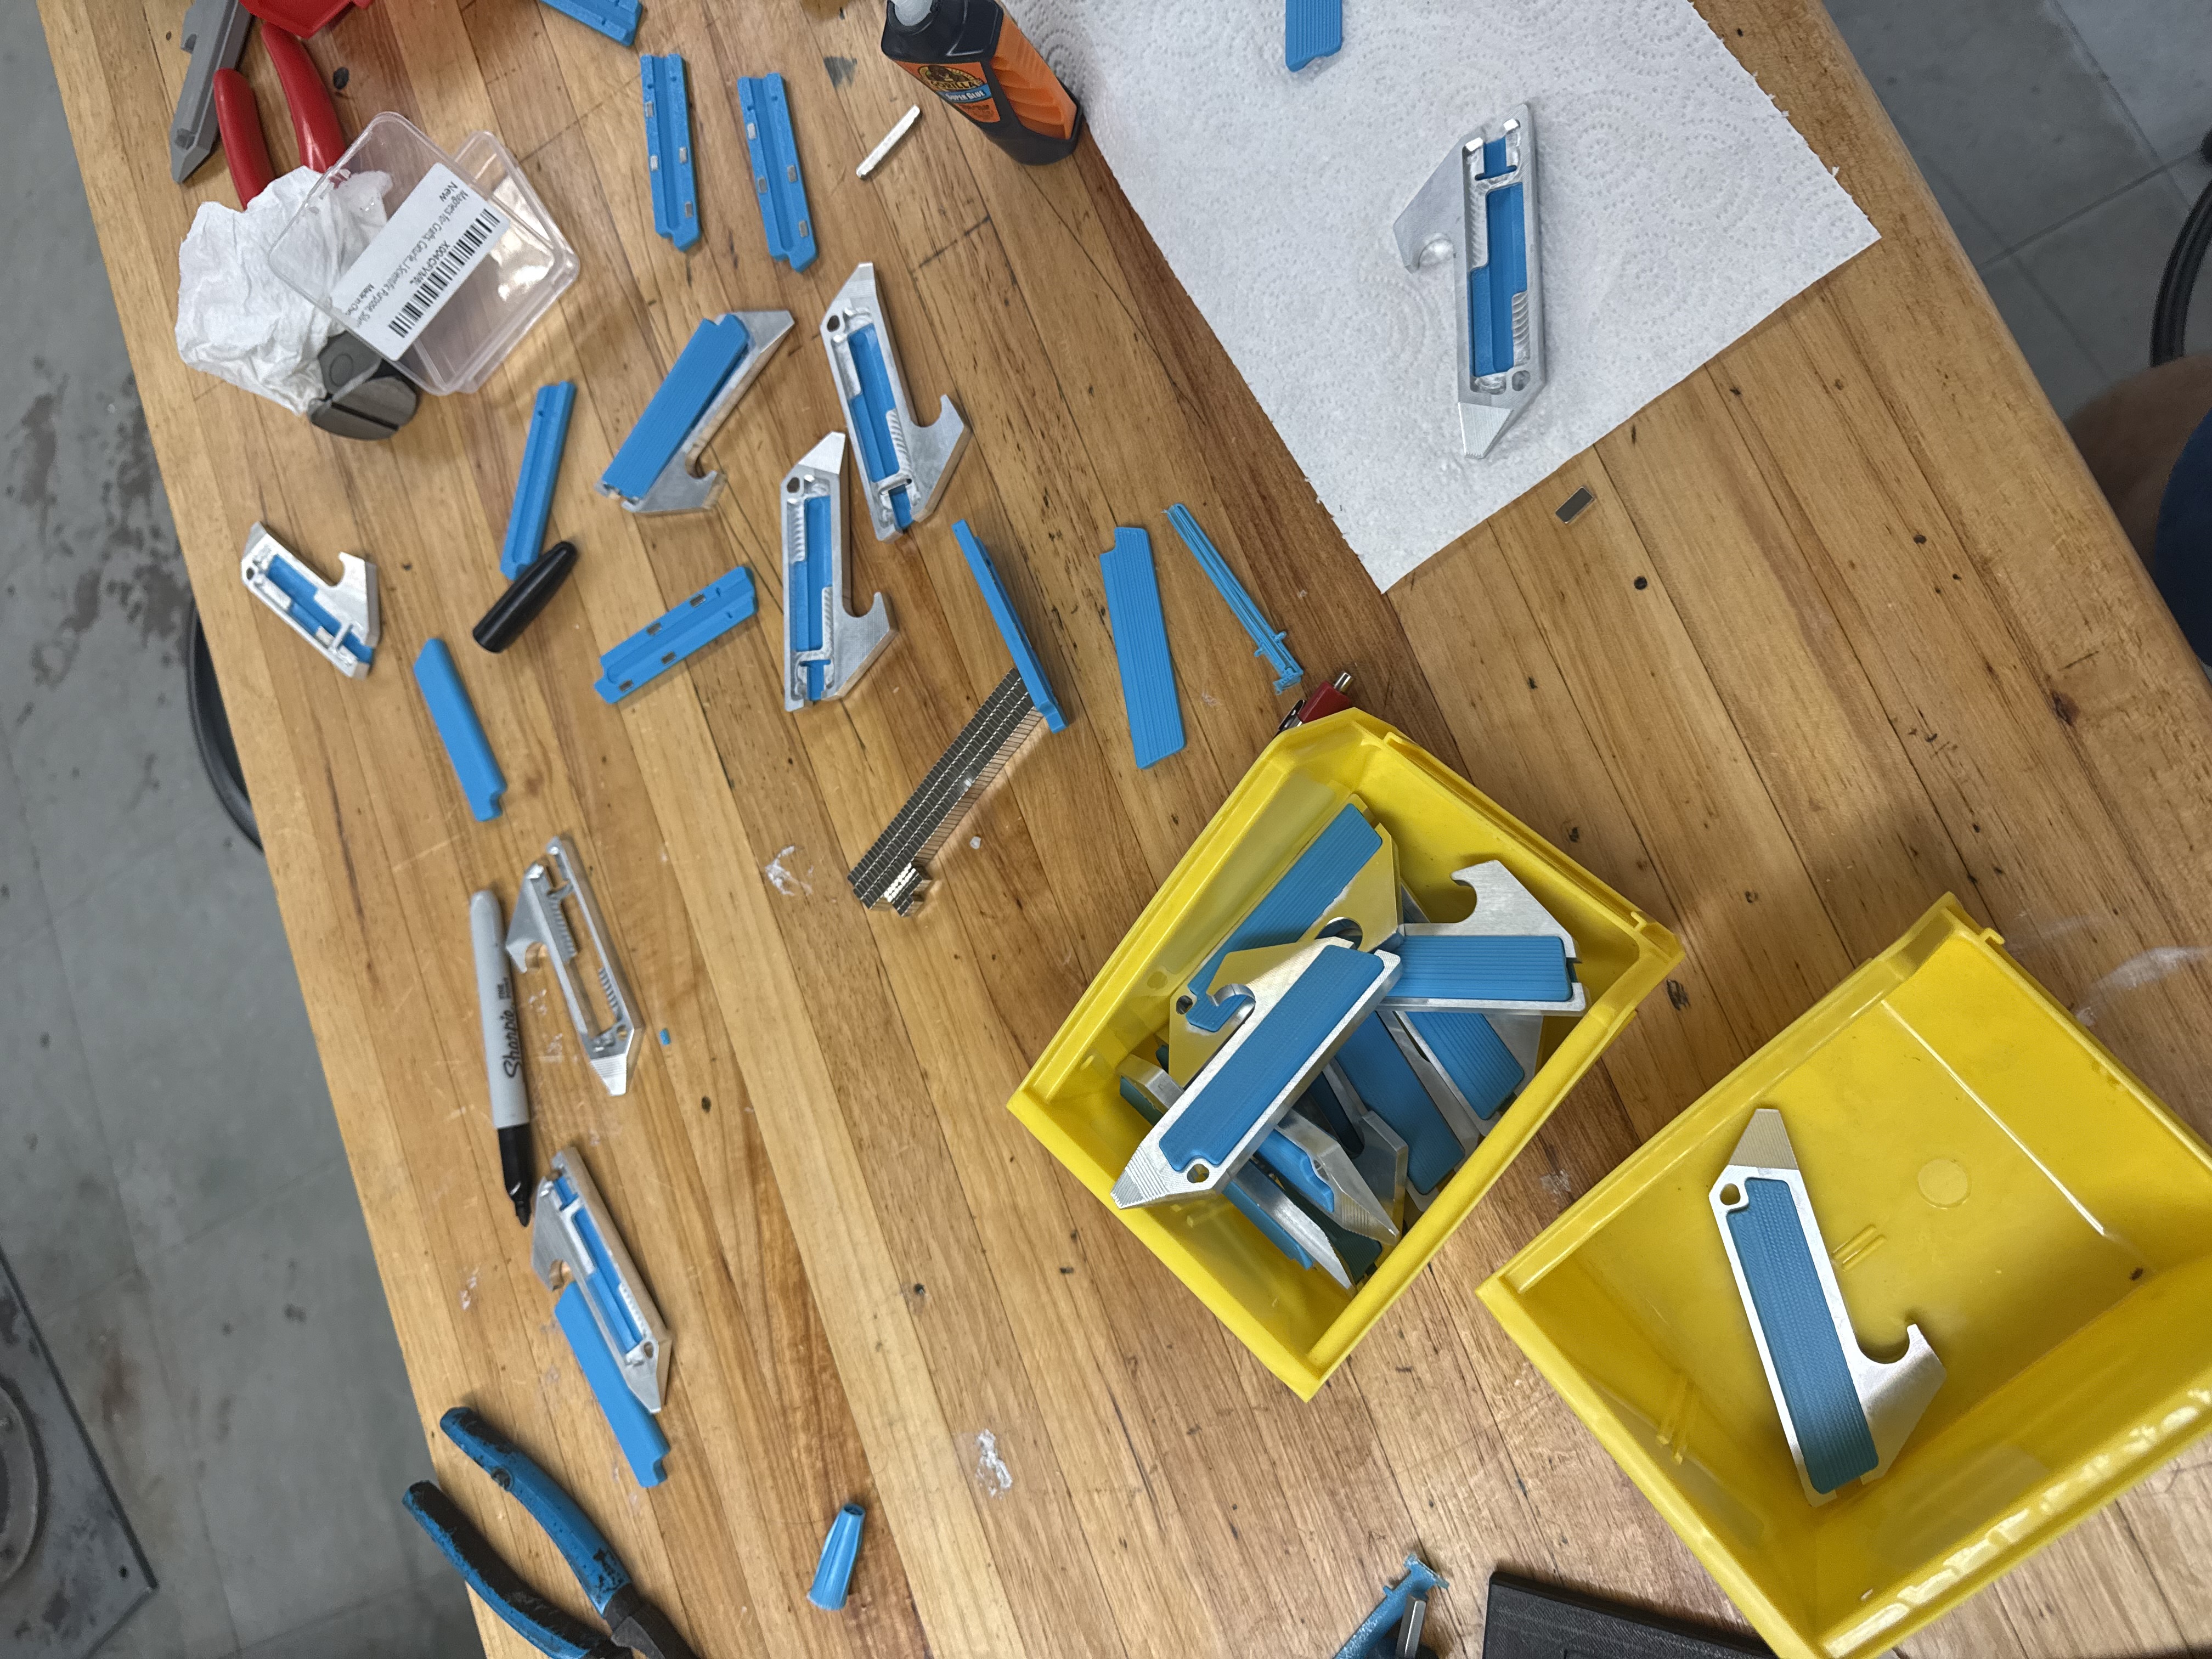
304 stainless turned out to be a poor material choice as we quickly found out how challenging it was to machine. We initially set out to make all 30 from the stainless but we were breaking so much tooling and had a high defect ratio it was going to be impossible to reach 30 units in time and on budget. More tooling and stainless steel was a gamble but out of budget so we decided to pivot to 6061 aluminum because it is much easier to work with and we were still able to use the stainless tooling we had left. We were also able to substantially simplify and shorten our production by changing to aluminum. Aluminum mills at much higher feeds and speeds and the stock we purchased was closer to our final dimension than the stainless was.
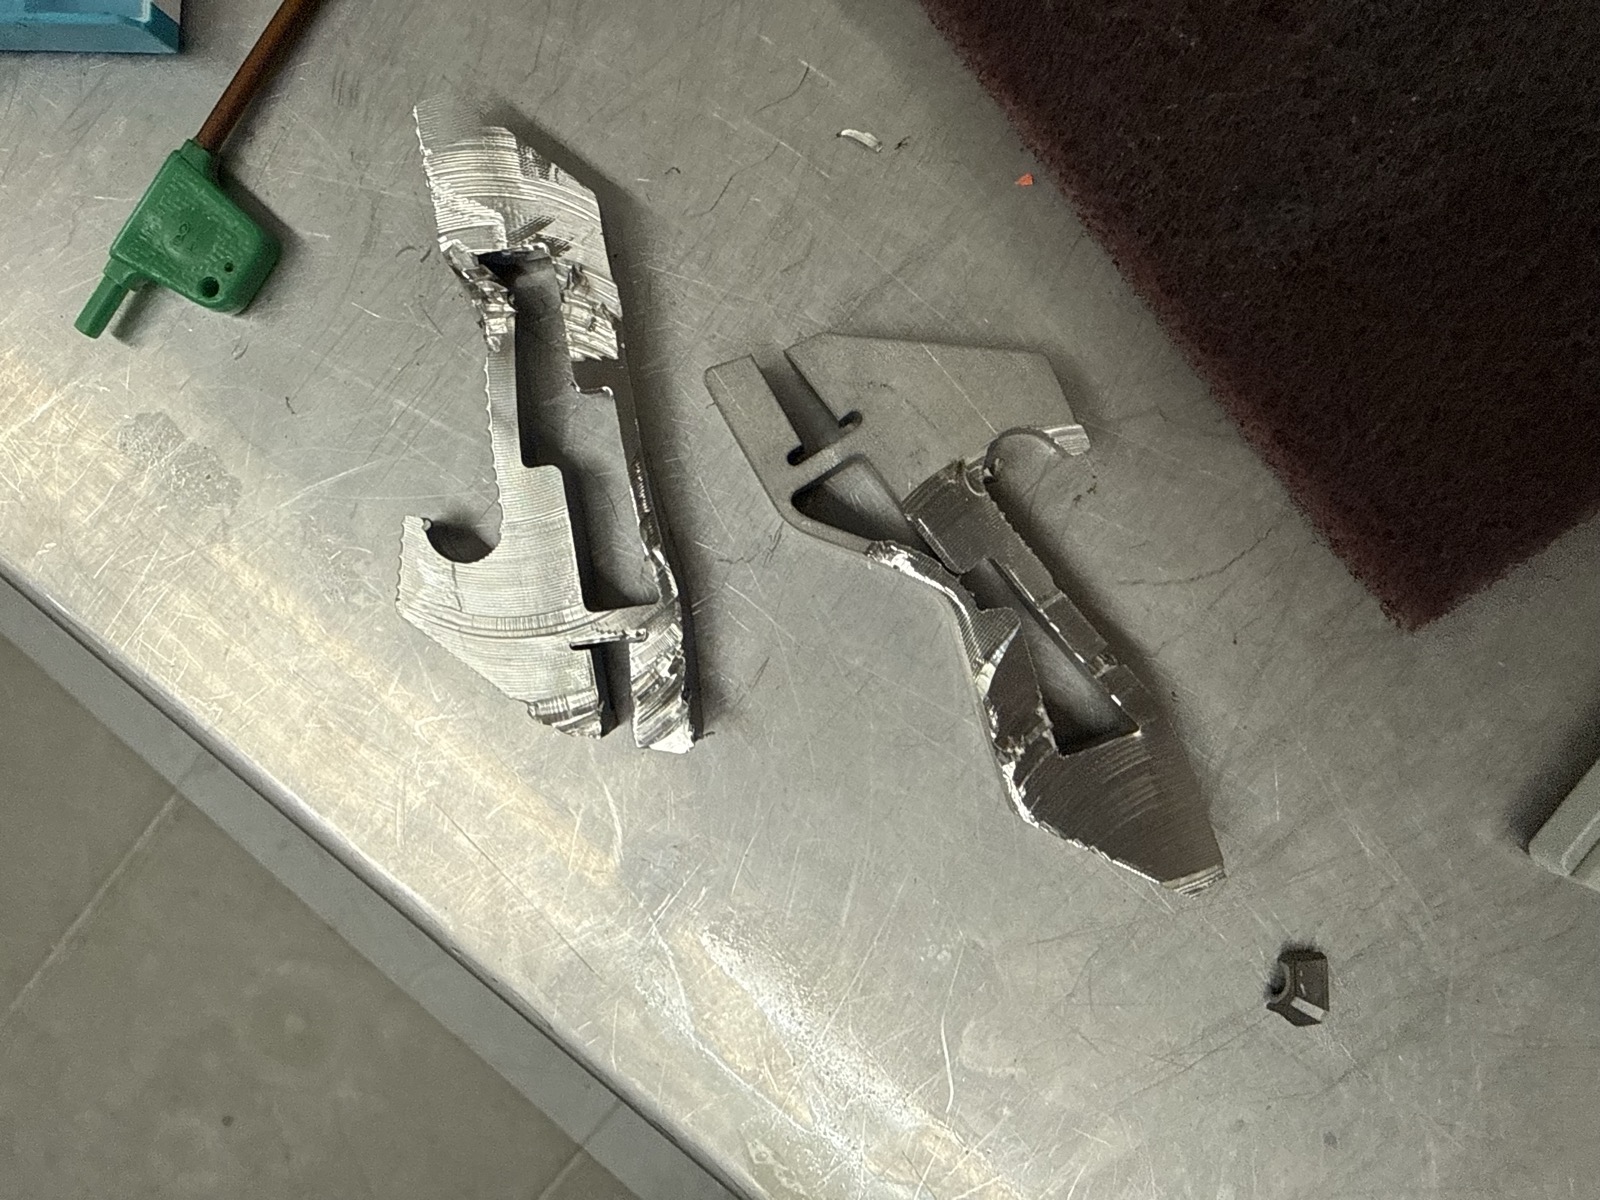
Scrapped stainless parts
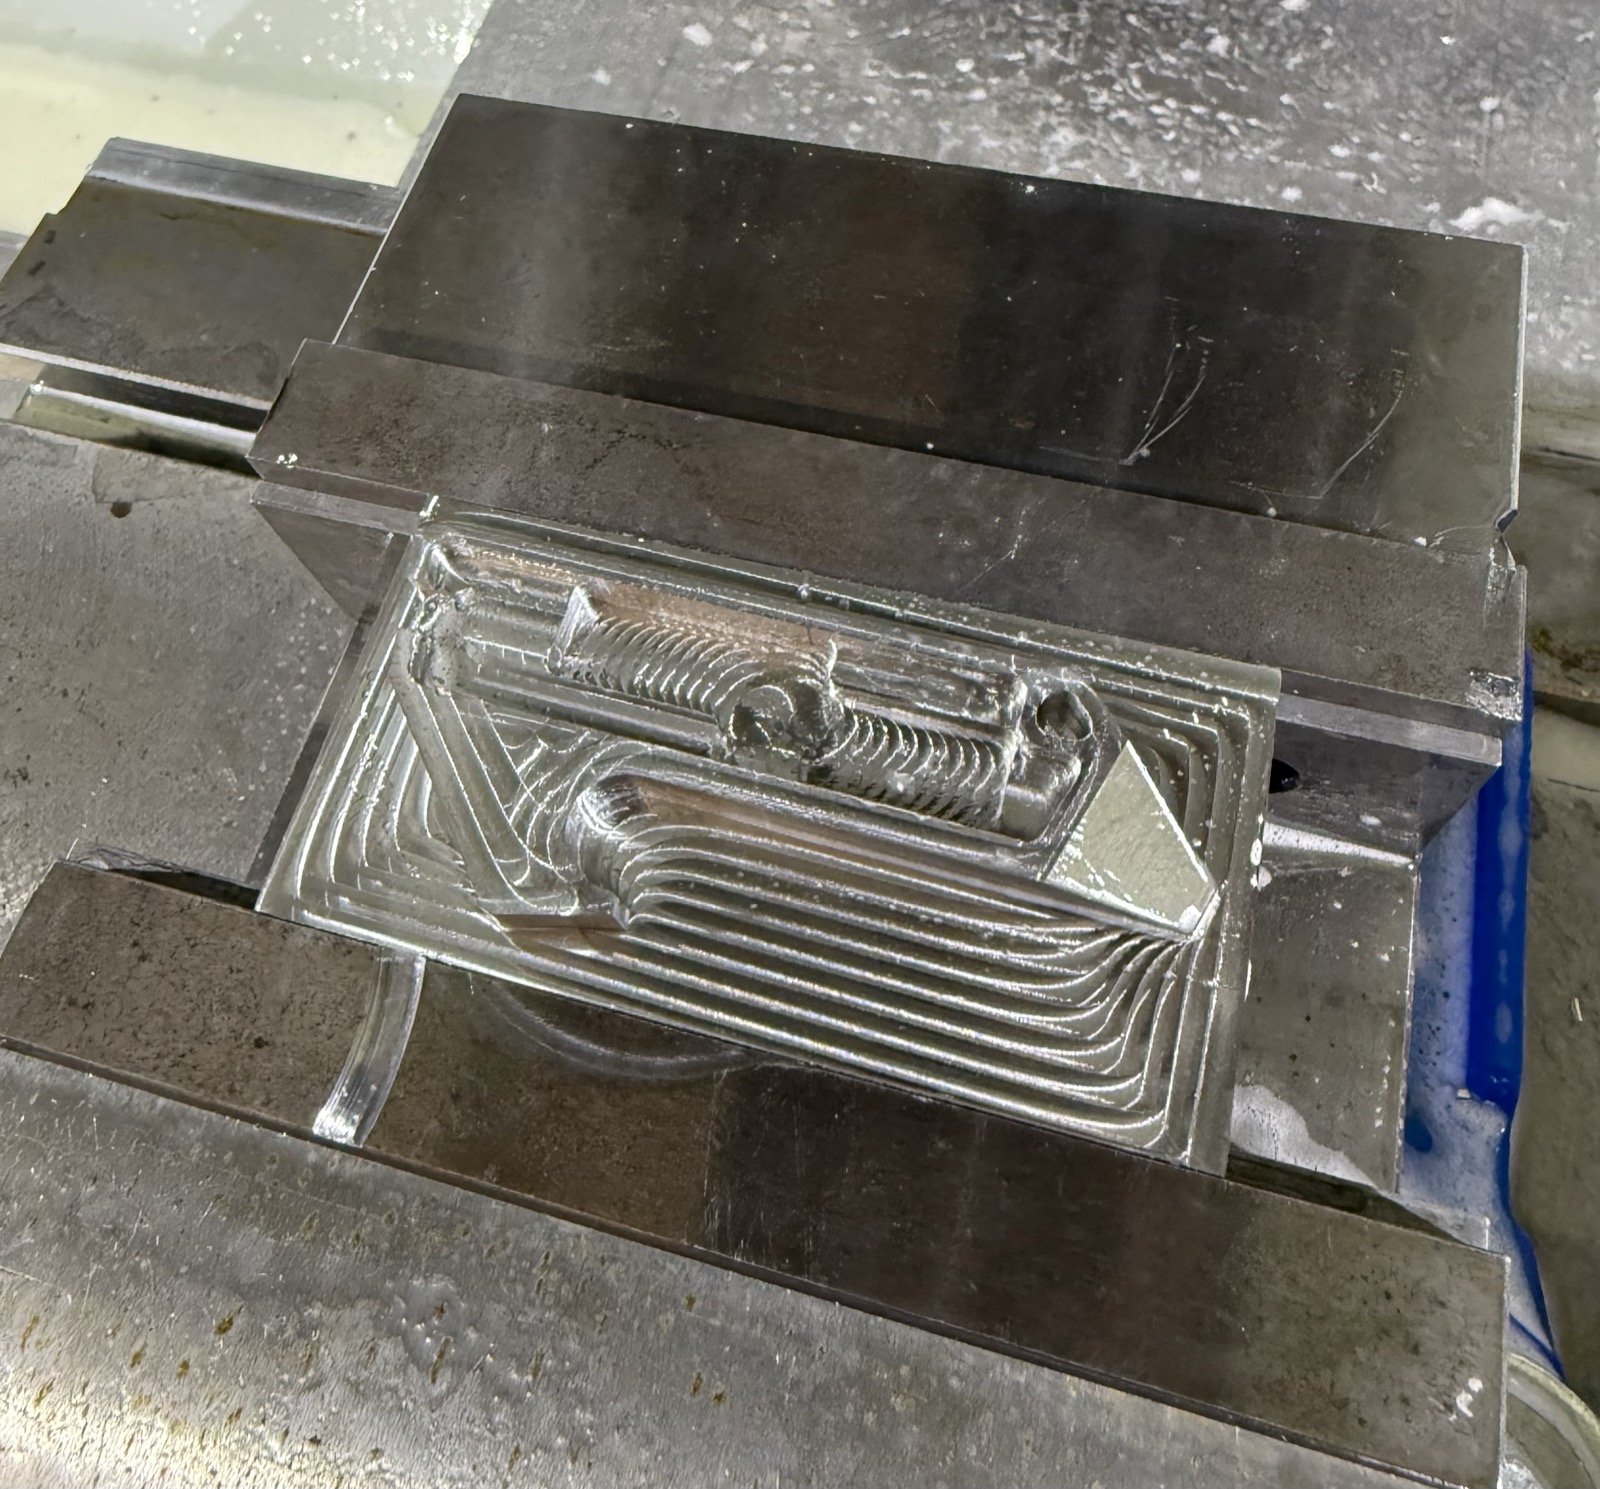
Mid-CNC in parallels
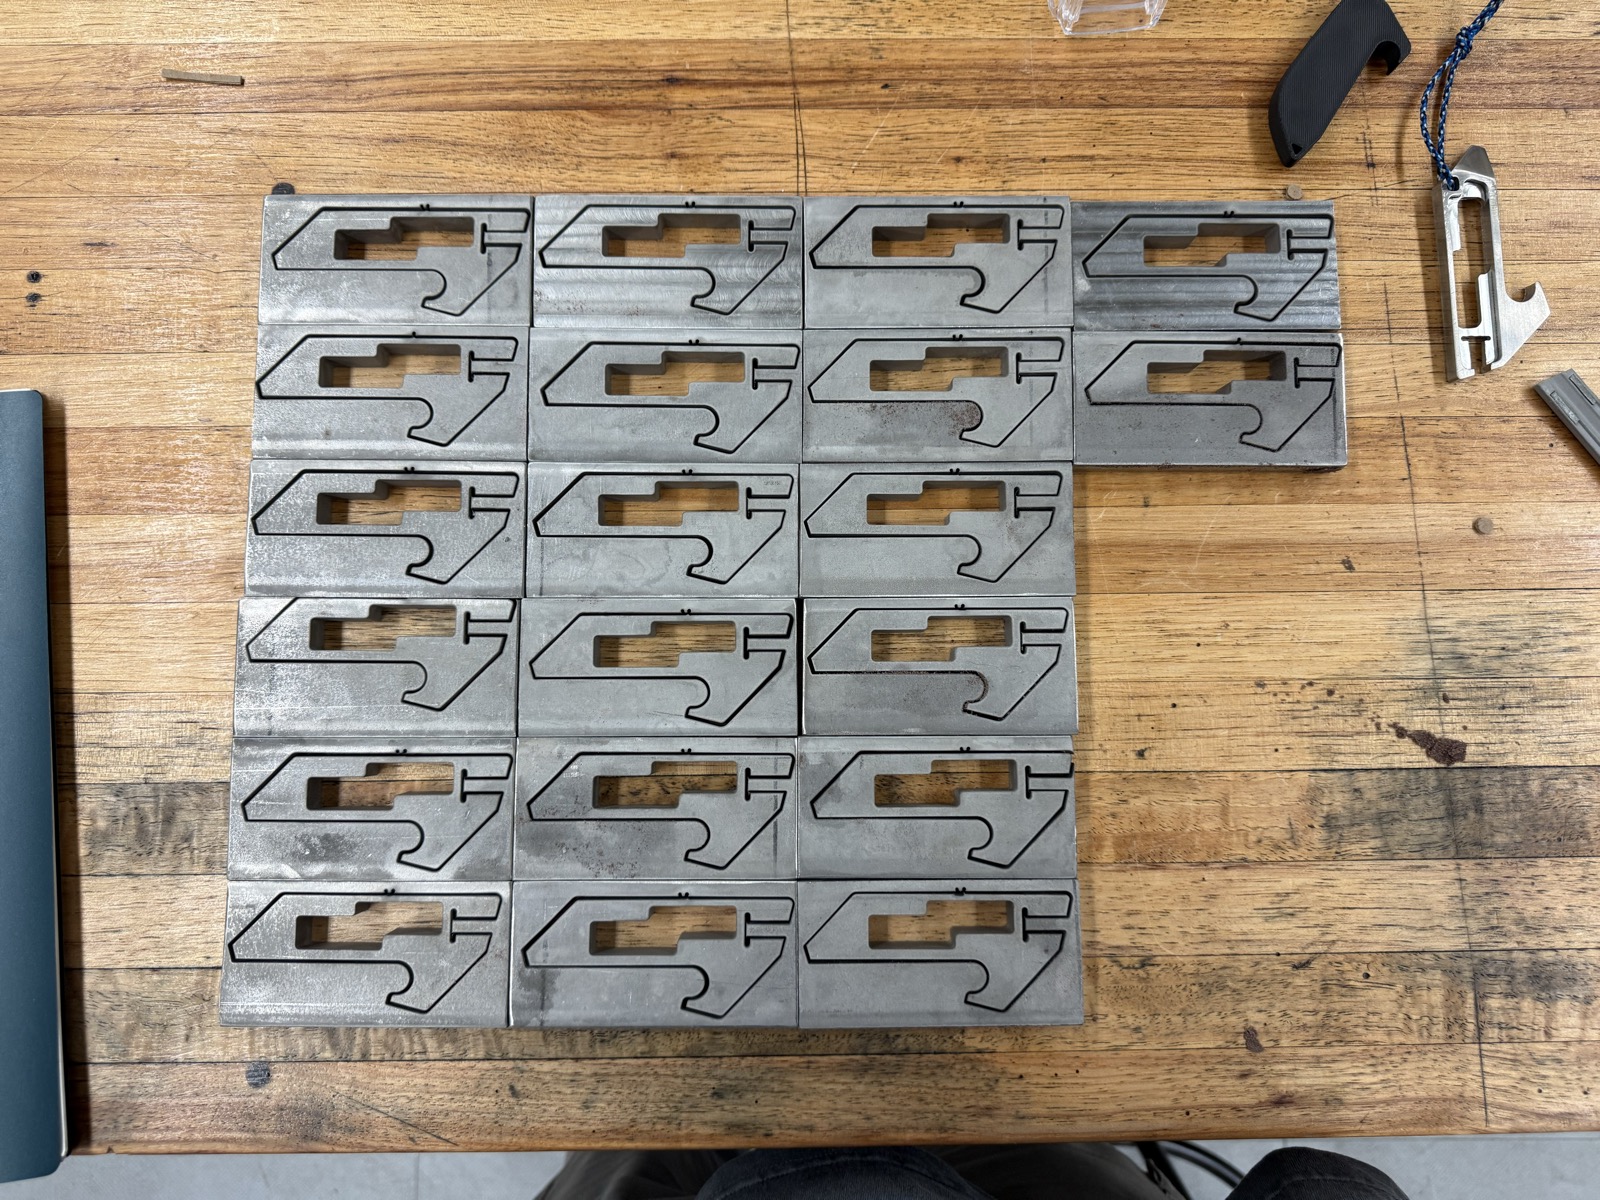
Waterjetted bodies
Stainless Steel Production Flow65 min / part
6061 Aluminum Production Flow32 min / part
Quality Control
Post-Cut Inspection
Calipers + square to verify length and flatness of faced surfaces before waterjet.
Post-Waterjet Check
Visual + template check for 2D profile accuracy and hole alignment.
CNC Go/No-Go
Go/No-Go gauge for pocket depth and scale fit after CNC milling.
3D Print QC
Body fit test, magnet fit test.
Final Inspection
Full visual + handling test: scales attach and don't wobble, correct magnet polarity, no sharp edges and a secure lanyard.
Business Model
$1,500 budget for 30 units
One of the project constraints was that this needed to be designed to work as a real business. The team modeled unit economics, set a retail price, and analyzed the competitive landscape before committing to a production run. All costs tracked against a $1,500 budget.
Fixed Costs
Tooling
Milling inserts, carbide end mills, aluminum soft jaws
Materials
304 stainless bar, 6061 aluminum bar, magnets, bits, PETG filament, packaging, adhesive, finishing supplies
Variable Costs (Per Unit)
Labor is an imputed estimate. Team members were not paid, but the cost was modeled as a class requirement.
Total Cost vs Budget
$173.22 under the $1,500 budget
Competitive Positioning
The $70 price point was set deliberately between the average tool ($11-25) and premium multi-tools we benchmarked against ($80-250).
Packaging
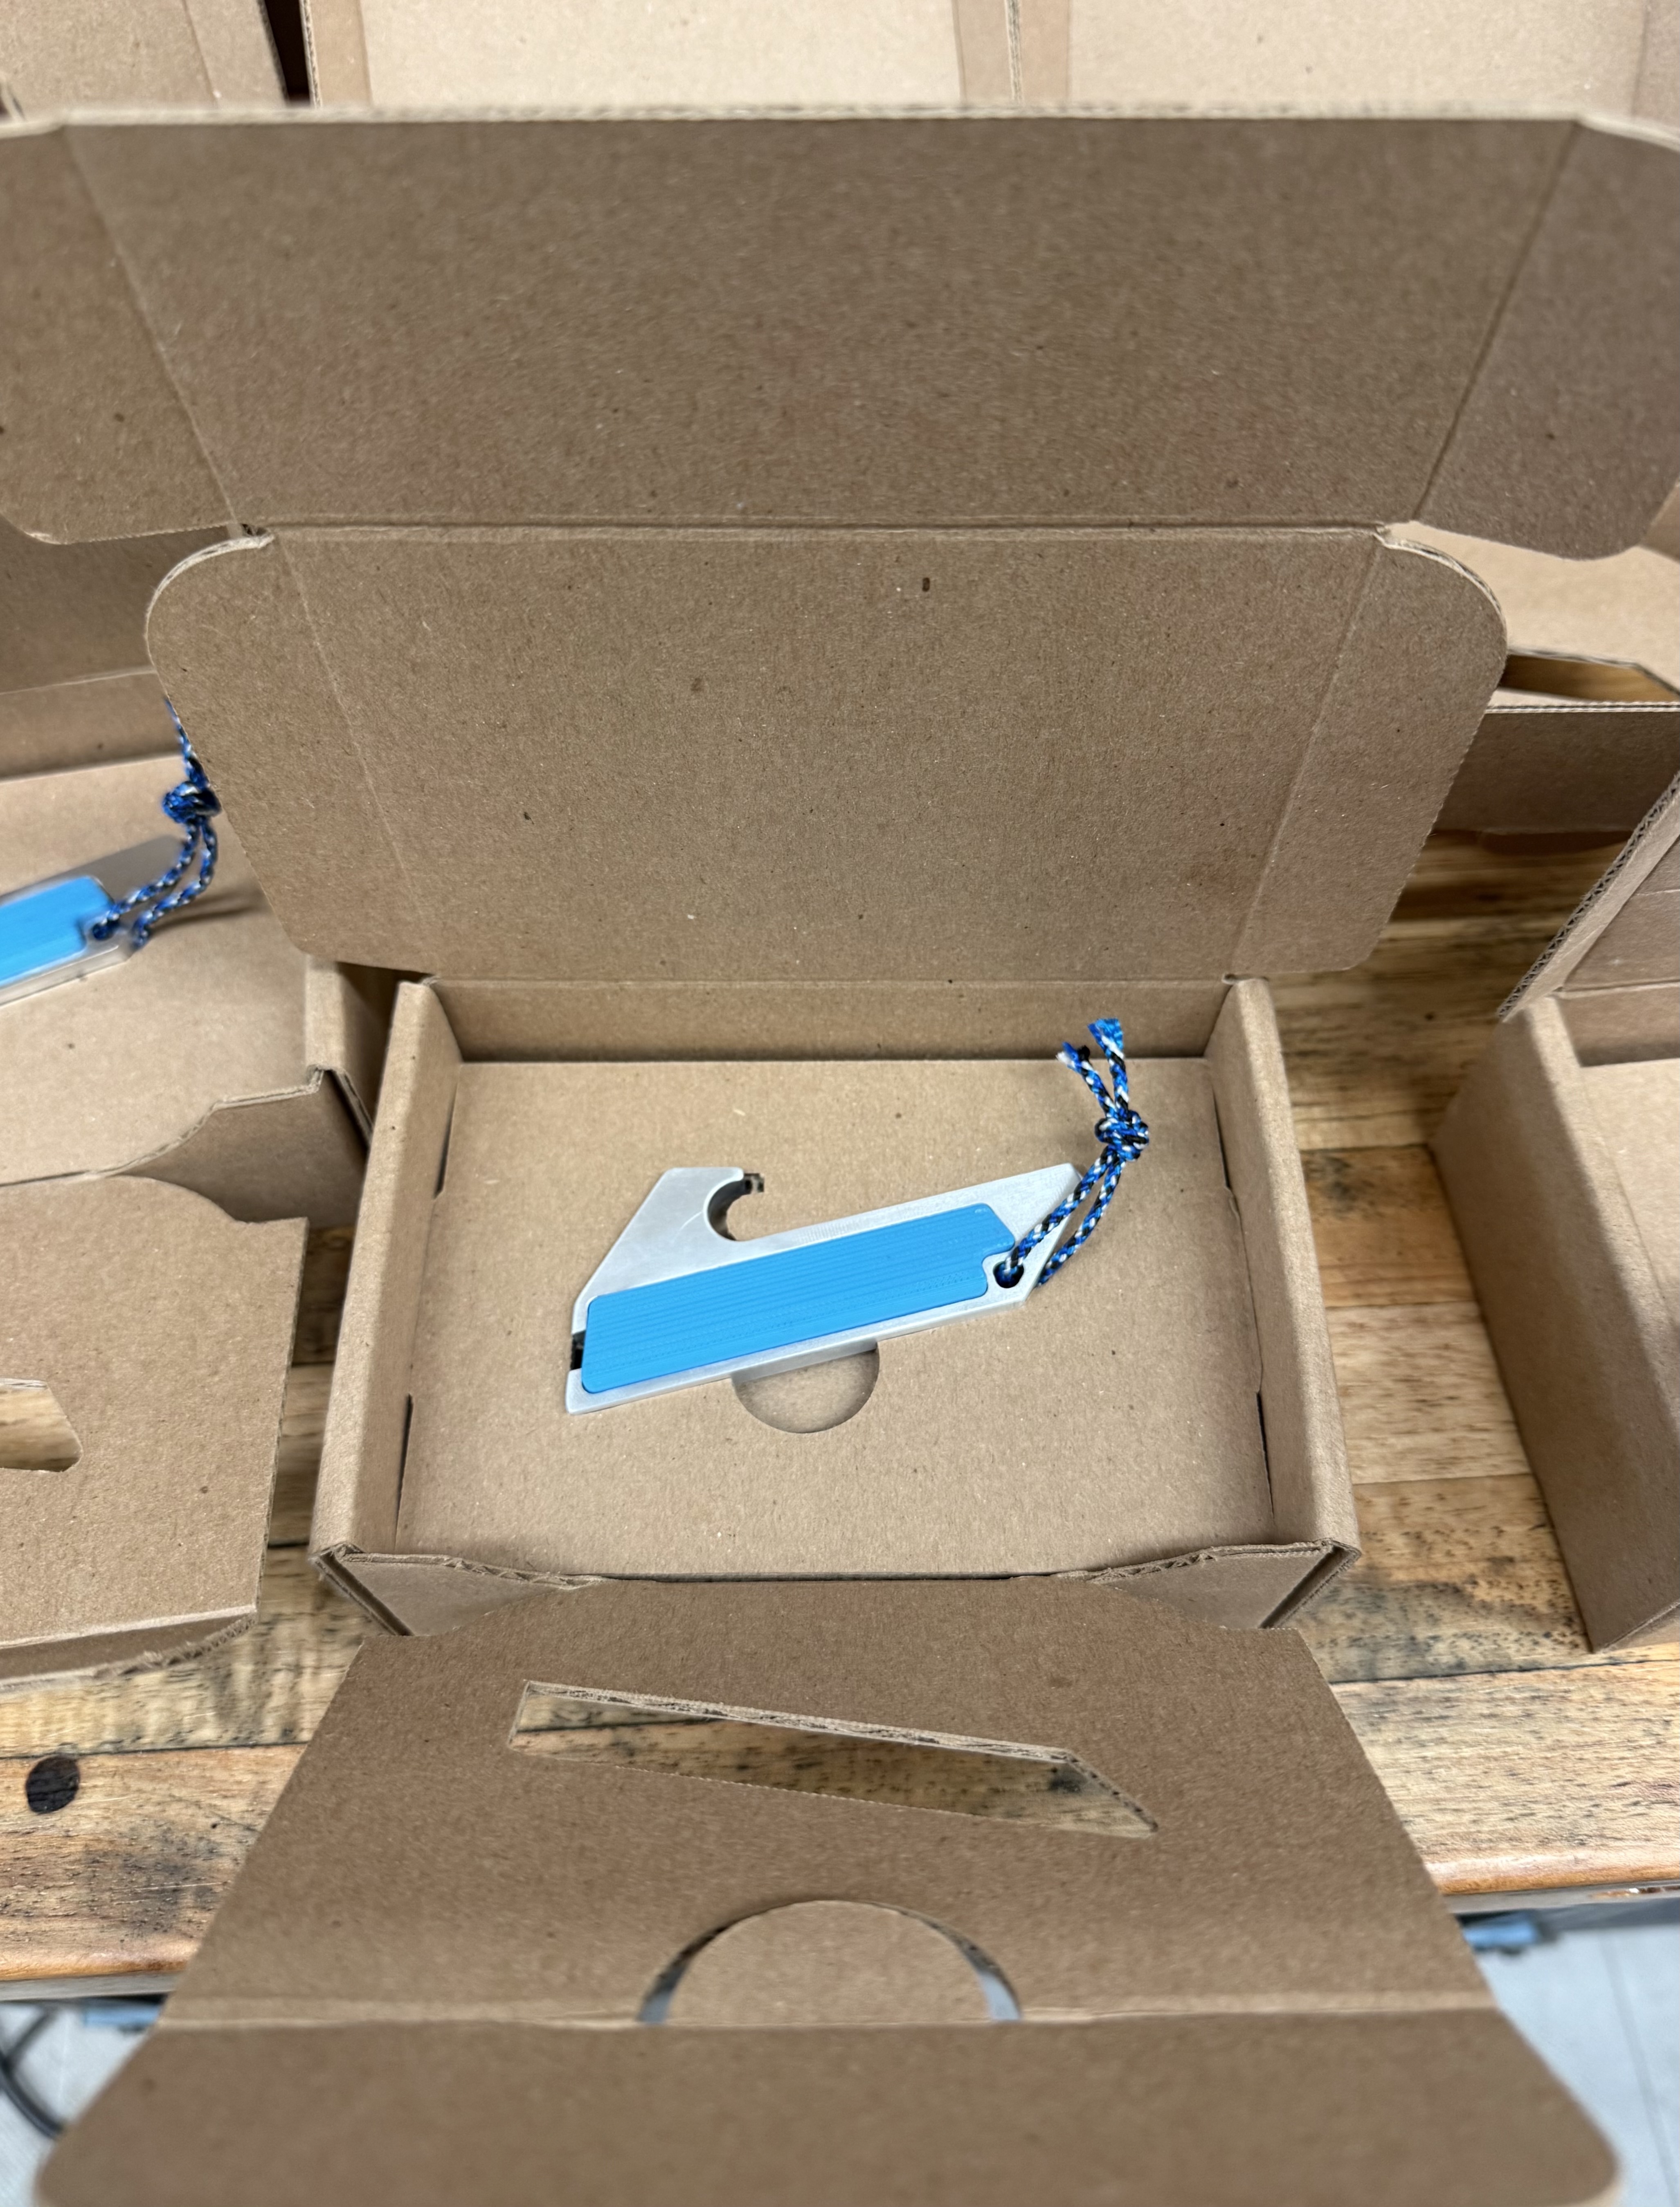
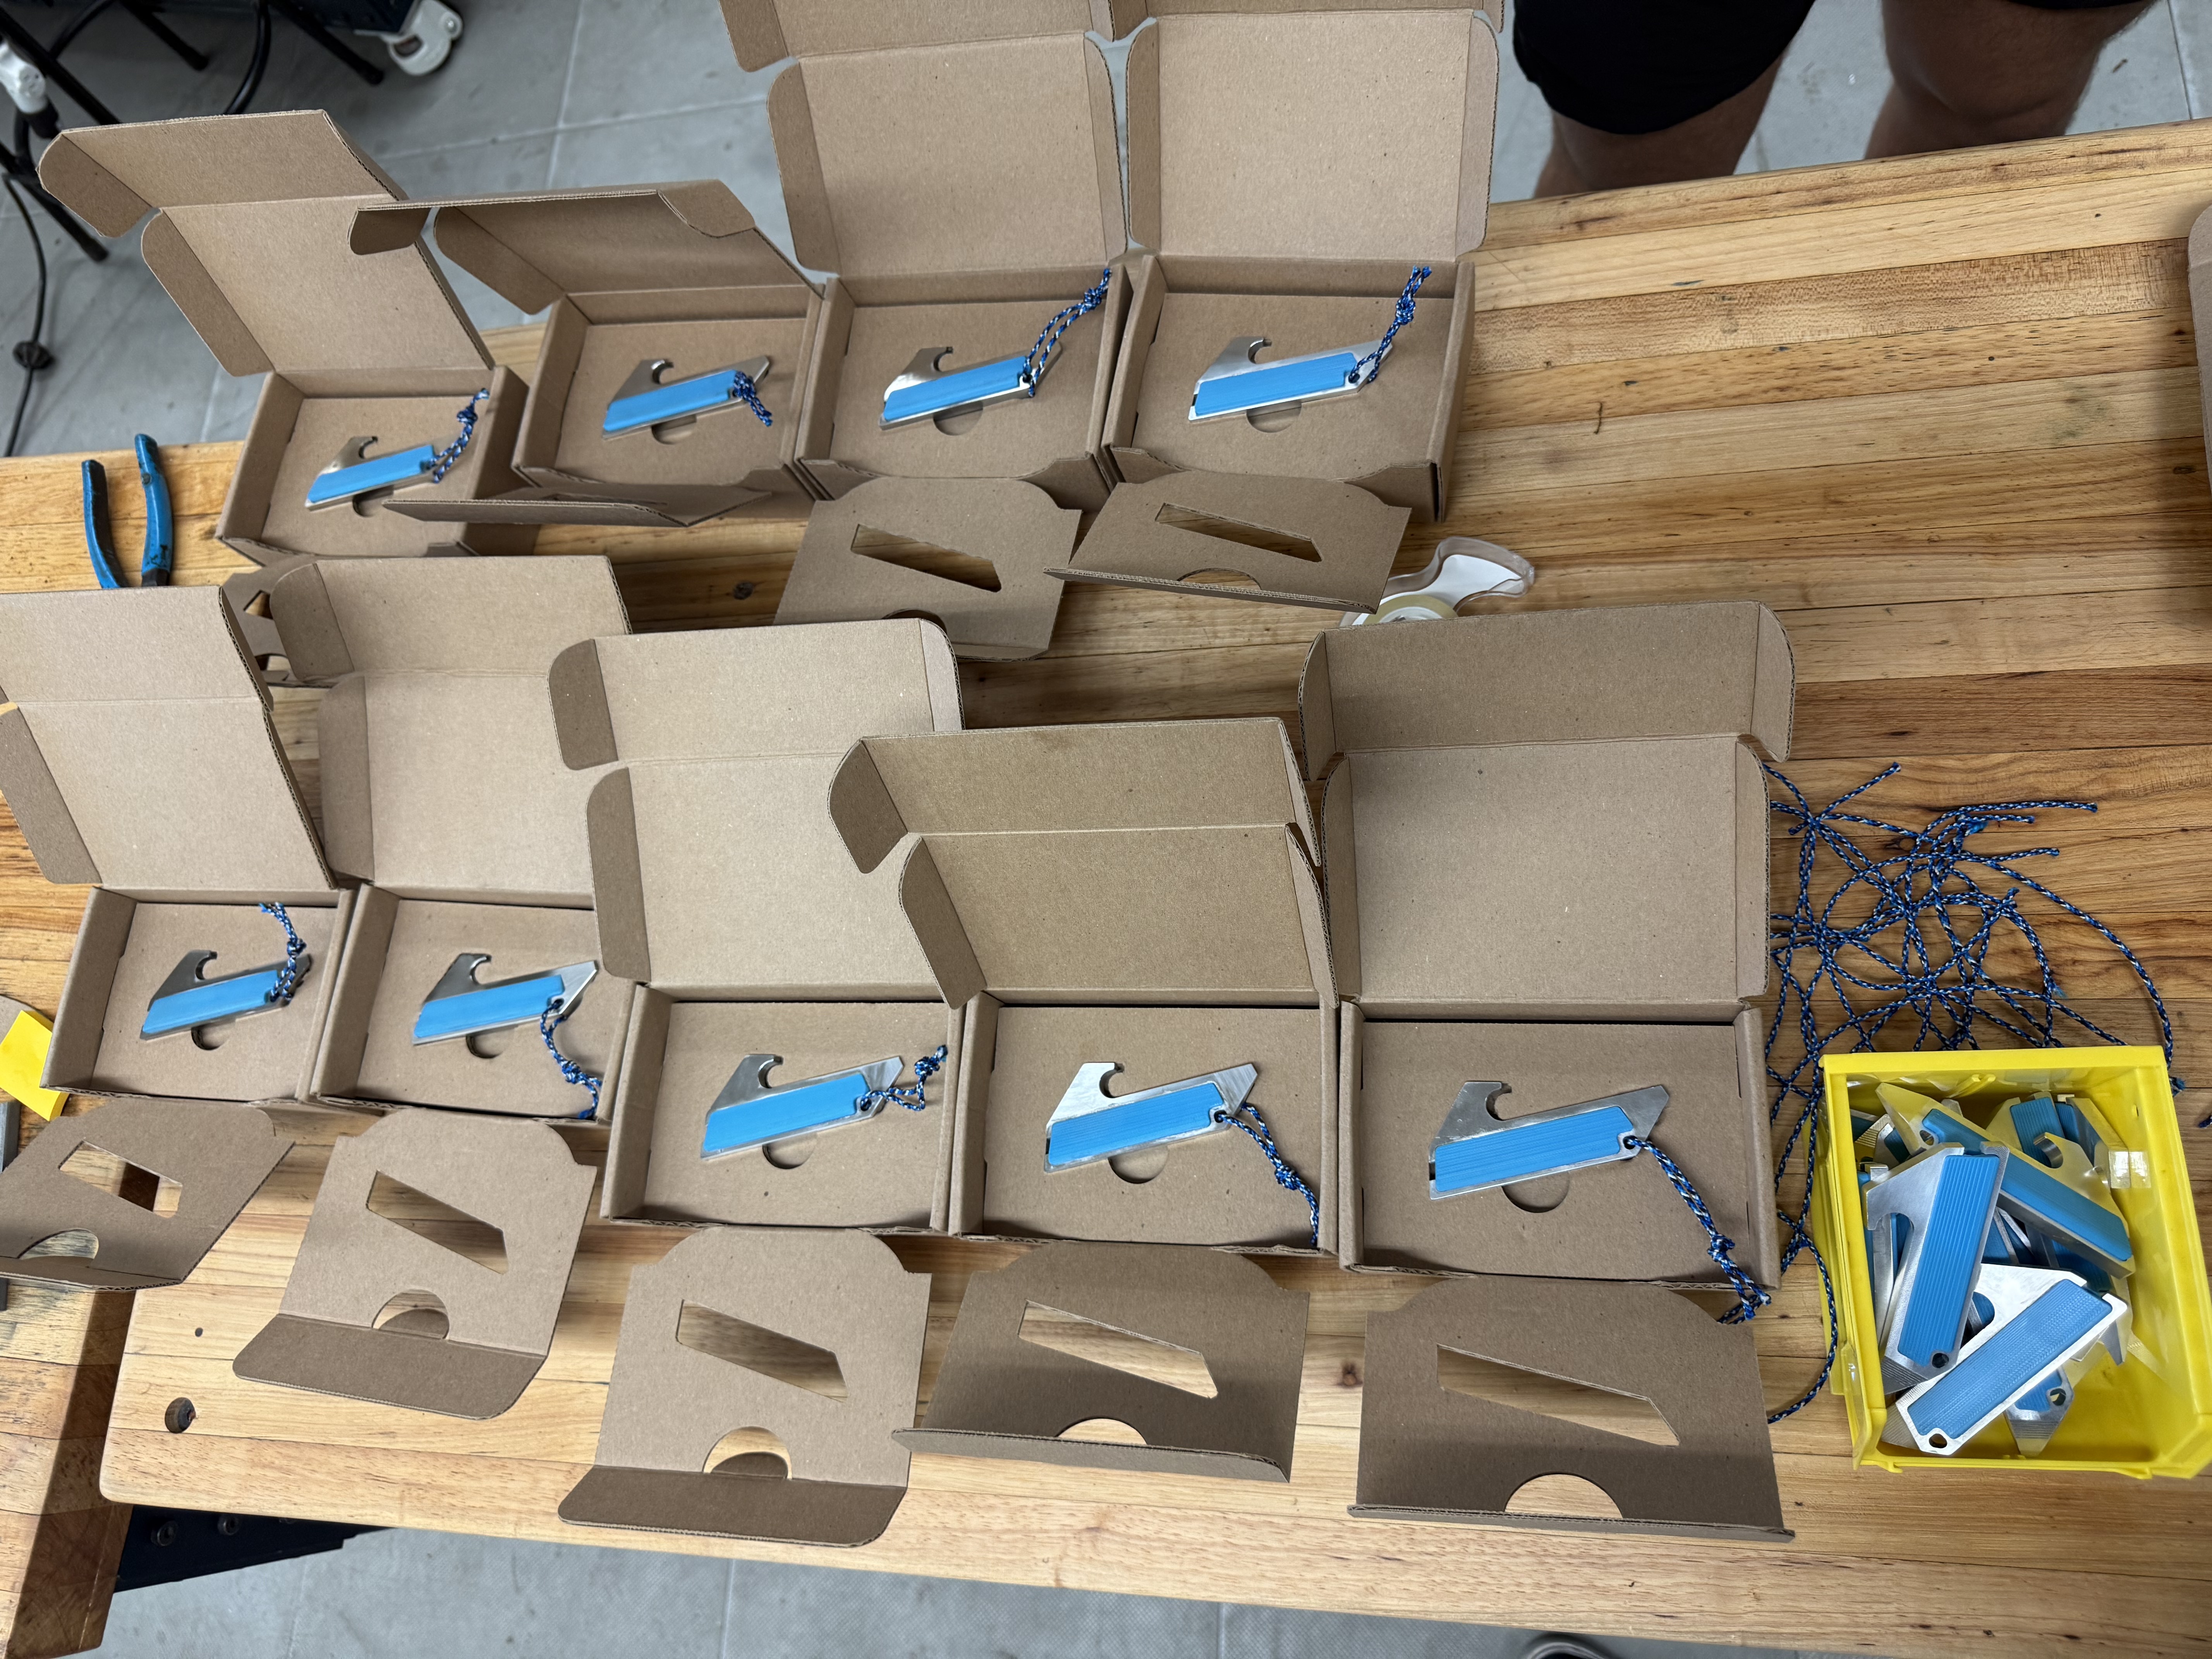
Custom sleeve-and-tray packaging sourced from Flush Packaging. $4/unit at 30-unit quantity.
Outcomes & Reflection
Overall the team, shop, and myself were pushed well beyond our comfort zones and were given the opportunity to learn valuable skills and get a taste of what it’s like to develop a product in the real world under a clear set of technical, financial, and timeline constraints.
We ran into many manufacturing bottlenecks along the way: shipping times for tooling, design revisions (so many design revisions), broken machinery and tooling, learning how to program CAM toolpaths for materials we’d never cut before, and the pivot from stainless to aluminum mid-production. Every one of those setbacks forced a decision under pressure, and that’s where the real learning happened.
What I Took Away
- →Ethnographic research isn't optional. Starting with real users instead of assumptions meant every design trade-off had a clear answer. We had to first identify and understand a problem before setting out to solve one. The final product shows how real the problem is and how well we understood it.
- →Materials are a manufacturing decision as much as they are a design one. 304 stainless looked great on paper but nearly killed the project and the CNC.
- →Get a manufactured prototype as soon as possible. Early physical parts reveal problems that CAD never will.
- →When the plan breaks, pivot fast. The switch to 6061 aluminum saved the timeline and the budget. Hesitating on that decision would have cost us both.
- →Document processes before you need to scale them. The magnet-embed step didn't have a work instruction until too late, and it showed in consistency and forced us to rework a lot of units.
Team
7-person cross-functional team at Cal Poly SLO, Industrial Technology and Packaging 467.